Have you been experiencing issues with your vehicle’s crankshaft position sensor wiring harness? If so, you’ve come to the right place! In this article, we will discuss how to fix a crankshaft position sensor wiring harness.
The crankshaft position sensor is a crucial component of your vehicle’s engine, responsible for transmitting data to the engine control unit. Ensuring its wiring harness is in proper working order is essential for maintaining optimal engine performance.
So, let’s dive in and explore how to fix the crankshaft position sensor wiring harness to get your vehicle back on the road smoothly.
Signs Of A Faulty Crankshaft Position Sensor Wiring Harness
A crankshaft position sensor wiring harness is vital for the proper function of your engine. When it begins to malfunction, it can cause various issues in your vehicle’s performance. It’s crucial to recognize the signs of a faulty crankshaft position sensor wiring harness, as addressing these issues promptly can prevent further damage to your vehicle.
Engine Misfiring
A faulty crankshaft position sensor wiring harness can lead to engine misfiring. This occurs when the harness fails to properly transmit signals to the engine control module, resulting in incorrect fuel injection timing. When the fuel is not injected at the precise moment, it can cause the engine to misfire, leading to a rough running engine, decreased fuel efficiency, and potential damage to other engine components.
Intermittent Starting Issues
Another indicator of a problematic crankshaft position sensor wiring harness is intermittent starting issues. When the harness is failing, it can lead to inconsistent signal transmission to the engine control module, causing improper ignition timing and leading to difficulty in starting the engine. This can result in unreliable vehicle performance and make it challenging to start your vehicle when needed.
Locating And Accessing The Crankshaft Position Sensor Wiring Harness
When it comes to troubleshooting and fixing issues with your vehicle’s crankshaft position sensor, one crucial component to check is the wiring harness. The wiring harness connects the sensor to the vehicle’s electrical system, ensuring proper communication and functionality. In this section, we will discuss how to locate and access the crankshaft position sensor wiring harness, making the repair process easier and more efficient.
Identifying The Sensor’s Location
In order to access the crankshaft position sensor wiring harness, it is essential to identify the sensor’s location within your vehicle. Consult the vehicle’s manual to locate the sensor, as it can vary depending on the make and model of your vehicle. Typically, the crankshaft position sensor is situated near the engine, either at the front or rear end. It is often attached to the engine block or the transmission housing.
Some common signs that indicate a faulty crankshaft position sensor include engine misfires, stalling, or difficulty in starting the vehicle. If you experience any of these issues, it is crucial to inspect the wiring harness to rule out any potential wiring-related problems.
Understanding Wiring Harness Connections
Once you have located the crankshaft position sensor, examine the wiring harness connections. The wiring harness is a bundle of wires that provides power and transmits signals between various electrical components. In this case, it connects the crankshaft position sensor to the vehicle’s electrical system.
| Wire Color | Function |
|---|---|
| Red | Power supply |
| Black | Ground |
| Green | Signal output |
Typically, the wiring harness consists of three wires: a red wire for power supply, a black wire for ground, and a green wire for signal output. In some cases, the wire colors may vary, so it is essential to refer to the vehicle’s manual or wiring diagram for accurate identification.
To access the wiring harness connections, you may need to remove any necessary components that obstruct your reach. These components could include protective covers, engine accessories, or other parts that hinder your access to the wiring harness. Additionally, make sure to disconnect the battery and take necessary safety precautions before working on the wiring harness.
Diagnosing Wiring Harness Issues
Diagnosing wiring harness issues, especially with the crankshaft position sensor, requires thorough inspection of the harness for any visible damage or wear. Ensure all connections are secure and free from corrosion, and if necessary, replace the wiring harness to fix the issue effectively.
Checking For Wire Damage
One of the first things you should do when diagnosing wiring harness issues with the crankshaft position sensor is to check for any signs of wire damage. This can include frayed or exposed wires, melted insulation, or loose connections. By visually inspecting the harness, you can quickly identify any potential problems. It is important to carefully examine the entire length of the wires to ensure nothing is overlooked.
If you notice any wire damage, it is crucial to address this issue promptly. You can either repair the damaged wires if the damage is minimal or consider replacing the entire wiring harness if the damage is extensive. Remember, even a small amount of wire damage can lead to poor sensor performance, so it is essential to take action immediately.
Testing For Continuity
Another crucial step in diagnosing wiring harness issues is to test for continuity. Continuity refers to the flow of electricity through the wires and helps ensure that there are no breaks or interruptions in the signal. To test for continuity, you will need a multimeter.
Using the multimeter, set it to the continuity or resistance setting and touch one probe to each end of the wire you are testing. If the multimeter beeps or shows a reading close to zero, it indicates that there is continuity and the wire is functioning correctly. On the other hand, if there is no beep or the reading shows infinite resistance, it suggests that there is a break or interruption in the wire.
It is important to test the continuity of all the wires in the crankshaft position sensor wiring harness. This will help you pinpoint any specific wires that may be causing the problem. Once you have identified the faulty wire, you can either repair it if the damage is minimal or replace the entire wiring harness if necessary. By ensuring proper continuity, you can be confident that the crankshaft position sensor will work correctly and accurately.
Repairing The Wiring Harness
When it comes to fixing the crankshaft position sensor wiring harness, repairing or replacing damaged wires and securing the harness properly are crucial steps. A faulty wiring harness can disrupt the communication between the crankshaft position sensor and the engine control unit, leading to misfires, stalling, and a host of other problems. In this section, we will delve into these two essential tasks to help you get your vehicle back on the road in no time.
Repairing or Replacing Damaged Wires
If you suspect that the wiring harness is the culprit behind your crankshaft position sensor issues, the first step is to carefully inspect it for any signs of damage. Damaged wires can be caused by a variety of factors, such as corrosion, wear and tear, or excessive heat. Once you identify the damaged wires, you have two options: repair or replace.
Repairing the wires involves stripping the damaged section, soldering the connection, and insulating it with heat shrink tubing or electrical tape. This method is suitable for minor damage or when replacing the entire harness is not feasible. However, if the damage is extensive or if multiple wires are affected, it may be more practical to replace the harness altogether.
Securing the Harness Properly
Once you have repaired or replaced the damaged wires, it is critical to ensure that the harness is secured properly. Securing the harness not only prevents it from becoming loose or detached but also protects it from any potential damage caused by constant vibration or rubbing against other components. Here are a few tips to help you secure the harness effectively:
- Use zip ties: Zip ties are an inexpensive and efficient way to secure the wiring harness. They can be easily adjusted and tightened to keep the harness firmly in place. Make sure to space the zip ties evenly along the harness to maintain a uniform level of support.
- Utilize mounting brackets: Depending on your vehicle’s make and model, there may be mounting brackets or clips designed specifically for the harness. These brackets provide additional support and help keep the wiring in position. Refer to your vehicle’s service manual or consult with a knowledgeable professional to determine the appropriate mounting locations.
- Inspect for clearance: During installation, ensure that the wiring harness has enough clearance from other components, such as sharp edges, moving parts, or areas with excessive heat. Proper clearance will help prevent any potential damage to the harness over time.
By following these guidelines, you can repair or replace the damaged wires and secure the harness properly, ensuring stable and reliable communication between the crankshaft position sensor and the engine control unit. Taking the time to address these issues will go a long way in resolving any crankshaft position sensor wiring harness problems, ultimately ensuring the optimal performance of your vehicle.
Reassembling And Testing
After successfully locating and fixing the wiring issues with your crankshaft position sensor, it’s time to reassemble and test the wiring harness. This step is crucial to ensure that the sensor functions properly and the wiring connections are secure. In this section, we will guide you through the process of reconnecting the harness and testing the sensor functionality.
Reconnecting The Harness
Start by inspecting the repaired wiring harness and making sure that all the damaged wires have been properly repaired or replaced. Check that the connections are secure and there are no loose or exposed wires.
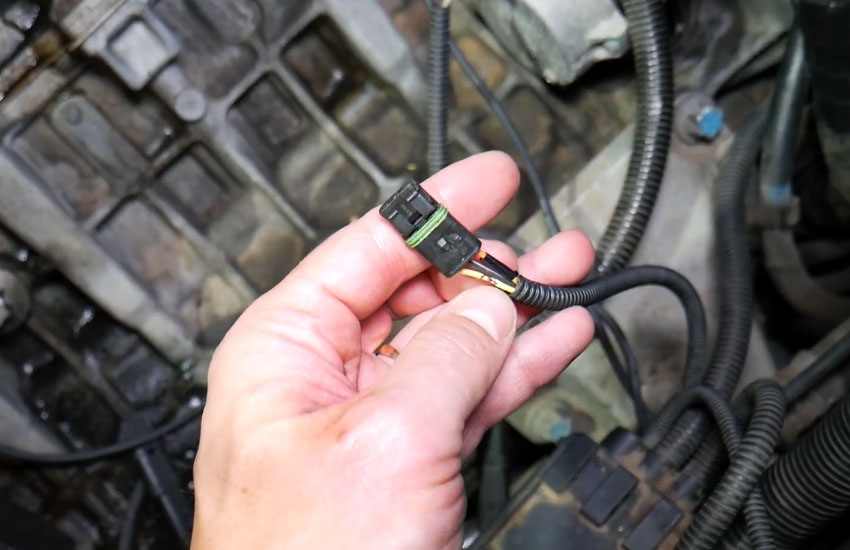
Next, carefully align the connector on the wiring harness with the sensor’s connector. Ensure that the pins are aligned and insert the connector until it clicks into place. This will ensure a secure and reliable connection.
Once the connectors are securely connected, double-check the routing of the wiring harness. Make sure it is properly routed and secured, away from any moving parts or sources of heat that may cause damage.
Testing Sensor Functionality
Now that you have reconnected the harness, it’s time to test the functionality of the crankshaft position sensor. Follow these steps to ensure that the sensor is working as expected:
- Start by turning on the ignition and allow the engine to idle. Observe the engine’s behavior and listen for any abnormal sounds. The sensor should provide accurate readings to the engine control unit (ECU).
- Revise the engine a few times and monitor its response. The crankshaft position sensor should accurately detect the engine’s rotational speed and provide the ECU with real-time data.
- If the engine starts and runs smoothly without any issues, it indicates that the sensor is functioning correctly. However, if you notice any irregularities, such as engine misfires or hesitation, it may indicate a problem with the sensor or its wiring.
It’s important to thoroughly test the sensor’s functionality to ensure that the wiring harness repairs were successful. If you encounter any issues or suspect that the sensor is not working properly, it may be necessary to further inspect and diagnose the problem.
Final Words
Fixing a crankshaft position sensor wiring harness is essential for ensuring the smooth running of your vehicle. By following the step-by-step guide provided in this blog post, you can easily troubleshoot and repair any issues with the wiring harness.
Remember to exercise caution and refer to your vehicle’s manual for specific instructions. By taking the time to address this issue, you can prevent further damage and costly repairs in the future. Drive safely!


