If you’re here, it’s likely because you want to learn how to remove a control arm ball joint from your vehicle. Whether you’re tackling this task as part of a suspension repair or upgrading your car’s suspension, removing a control arm ball joint can seem intimidating. But don’t worry – this ultimate guide will walk you through each step, and by the end, you’ll feel confident about getting your hands dirty and doing the job yourself. It’s all about understanding the process, having the right tools, and keeping things safe!
What Is a Control Arm Ball Joint, and Why Would You Need to Remove It?
The control arm ball joint is a crucial part of your car’s suspension system, connecting the control arm to the steering knuckle. It allows the wheels to move up and down while turning, ensuring smooth handling and comfort. However, like any other component in your car, the ball joint can wear out over time, which can lead to issues like uneven tire wear, clunking sounds while driving, or poor handling.
There are several reasons you might need to remove the ball joint:
- Ball Joint Failure: Over time, the ball joint can wear out due to friction and exposure to road elements. If you hear a popping or clunking noise, it could indicate that the ball joint is loose or damaged.
- Suspension Upgrades: If you’re upgrading your suspension components to improve handling or performance, replacing the control arm ball joint might be part of the process.
- Routine Maintenance: Sometimes, it’s part of routine maintenance to check and replace suspension parts that are showing signs of wear, and removing the ball joint might be necessary for that.
Knowing when and why to remove it is only the first part. Now let’s dive into how to safely remove the control arm ball joint with the right tools and steps.
Step-by-Step Guide to Removing a Control Arm Ball Joint
Removing a control arm ball joint might sound like a complicated task, but with the right tools, some patience, and a solid understanding of the steps, it’s definitely manageable. Here’s a detailed step-by-step guide to help you through the process.
1. Gather the Necessary Tools and Safety Gear
Before jumping into the removal process, it’s important to have everything you need ready. Here’s a list of tools you’ll require:
- Jack and Jack Stands: You’ll need a reliable jack and jack stands to lift and support the vehicle safely.
- Wrenches and Socket Set: A variety of wrenches and sockets will help you remove the bolts securing the ball joint.
- Ball Joint Separator or Press: This tool is essential for separating the ball joint from the control arm. Some vehicles may require a ball joint press, while others may allow for separation using a hammer and separator tool.
- Torque Wrench: This tool ensures you’re tightening or loosening bolts to the correct specifications.
- Safety Glasses and Gloves: Always protect your eyes and hands during a DIY repair project. The last thing you want is an injury from flying debris or sharp parts.
- PB Blaster or WD-40: This is used for loosening stuck bolts or parts that may have become rusted over time.
Once you have your tools ready, make sure the car is on a flat, stable surface, and you have enough space to work comfortably.
2. Lift the Vehicle and Remove the Wheel
The first physical step is to lift the vehicle and remove the wheel. Here’s how to do it:
- Lift the Car: Use the jack to lift the car off the ground. Make sure you lift it at the correct jacking points as outlined in your vehicle’s owner manual.
- Place Jack Stands: Once the car is lifted, place the jack stands underneath the car for added safety. Never rely solely on the jack to hold the car up.
- Remove the Wheel: After the car is safely supported, use a wrench to remove the lug nuts and take the wheel off. This will expose the control arm and ball joint for easy access.
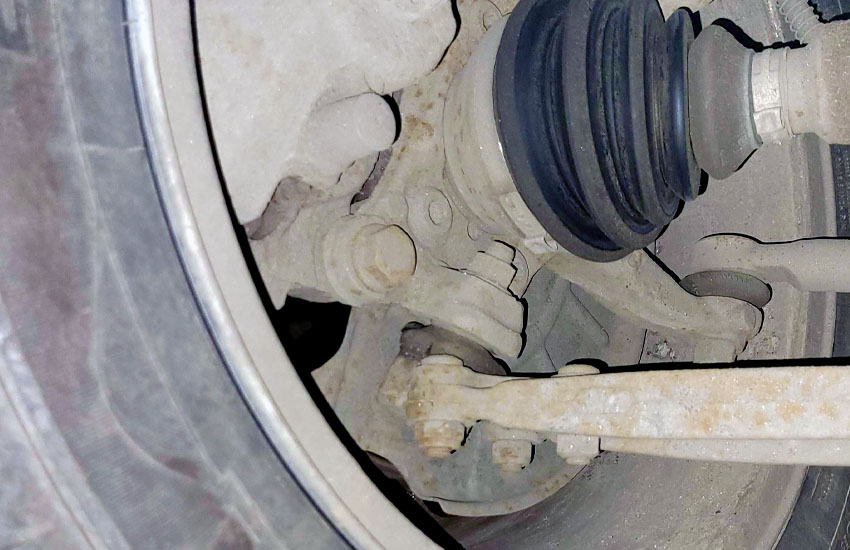
3. Locate the Ball Joint and Assess Its Condition
Now that the wheel is removed, take a close look at the ball joint. The ball joint will usually be located where the control arm connects to the steering knuckle. Examine the area to check if the ball joint is visibly damaged, worn, or loose. Look for any cracks, signs of rust, or leaking grease, as these can indicate wear.
If you’re replacing the ball joint due to damage or wear, this is a good time to assess the rest of the suspension components for any additional issues.
4. Remove the Bolts or Nuts Securing the Ball Joint
The next step is to remove the bolts or nuts that secure the ball joint to the control arm and steering knuckle. These bolts can sometimes be difficult to remove due to rust or corrosion, so it’s important to apply some PB Blaster or WD-40 beforehand to loosen them up.
Here’s the breakdown of this step:
- Locate the Fasteners: There will typically be two or three bolts or nuts that hold the ball joint in place. Use a wrench or socket to remove these fasteners.
- Loosen the Fasteners: Depending on the vehicle, you may need to remove one nut or multiple nuts that attach the ball joint to the steering knuckle and control arm. Keep track of each bolt’s position so you can reinstall them correctly.
5. Separate the Ball Joint from the Control Arm
Now comes the tricky part: separating the ball joint from the control arm. This is often the most challenging step, as the joint can get stuck or seized over time. There are two common methods to do this:
Method 1: Ball Joint Separator Tool
A ball joint separator tool is specifically designed to separate the ball joint from the control arm without damaging the surrounding parts. Here’s how to use it:
- Position the Separator: Place the separator tool between the ball joint and the control arm.
- Tighten the Tool: Use a wrench or ratchet to tighten the separator tool, which will push the ball joint out of its place. You may hear a popping sound when the ball joint finally separates.
Method 2: Hammer Method (If Applicable)
If you don’t have a separator tool, you can use a hammer to strike the control arm near the ball joint. However, this method requires caution to avoid damaging other components:
- Tap with the Hammer: Gently tap the control arm near the ball joint, using a hammer to loosen the joint from the control arm.
- Use a Piece of Wood: You can place a piece of wood between the hammer and the control arm to help reduce the force on the suspension components and avoid causing damage.
In some cases, you may need a combination of these methods, so be patient and work carefully.
6. Remove the Ball Joint from the Control Arm
Once the ball joint is separated from the control arm, carefully pull it out. You may need to use a little force, but be careful not to damage any surrounding parts. If the ball joint is stuck, tapping around the edges gently with a hammer might help dislodge it.
7. Inspect the Control Arm and Steering Knuckle
With the ball joint removed, take a moment to inspect the control arm and steering knuckle for any damage or wear. If either component is damaged, now is the perfect time to replace it.
8. Install the New Ball Joint
Now that the old ball joint is removed, it’s time to install the new one. Make sure the new ball joint matches the specifications of the old one. Insert the new ball joint into the control arm, and secure it with the fasteners. Tighten the bolts using a torque wrench to ensure everything is tightened to the proper specifications.
9. Reassemble the Vehicle
Once the new ball joint is installed, reverse the steps to reassemble the vehicle:
- Reattach the steering knuckle to the control arm.
- Install the wheel and tighten the lug nuts.
- Lower the car back onto the ground.
10. Test the Vehicle
Finally, take the car for a test drive to make sure everything is functioning properly. Listen for any unusual noises and check the handling. If you notice any issues, it might be worth revisiting the installation steps or getting a professional mechanic to check your work.
I hope this guide has helped you understand the process of removing and replacing your control arm ball joint. With the right tools and a little patience, you can tackle this repair yourself and save money while improving your car’s suspension performance.
Frequently Asked Questions
Is it hard to remove a control arm ball joint?
Removing a control arm ball joint can be tricky, but with the right tools and patience, it’s definitely doable. Be sure to have a ball joint separator or press to make the job easier.
Can you replace a ball joint without removing the control arm?
In most cases, the ball joint needs to be removed from the control arm to replace it. However, some vehicles may have designs that allow the ball joint to be replaced without removing the entire control arm.
Do I need special tools to remove a ball joint?
Yes, a ball joint separator or press is usually required to separate the ball joint from the control arm. These tools help prevent damage to surrounding parts and make the job easier.
Is it safe to drive with a bad ball joint?
It is not safe to drive with a bad ball joint. A worn-out ball joint can cause poor handling, clunking noises, and even suspension failure, putting your safety at risk.
Can I replace the ball joint myself?
Yes, if you have the necessary tools and experience, you can replace the ball joint yourself. Just make sure to follow the steps carefully and take safety precautions.
Do I need to realign my car after replacing the ball joint?
In most cases, after replacing the ball joint, a wheel alignment is recommended to ensure the vehicle handles correctly and to prevent uneven tire wear.
Is it possible to remove a ball joint without a press?
Yes, you can remove a ball joint without a press, but it may require a hammer and a ball joint separator tool. However, using a press is much easier and safer.
Can a ball joint be repaired instead of replaced?
Ball joints are typically not repairable. If a ball joint is damaged or worn, it should be replaced with a new one to ensure proper function and safety.