Have you ever wondered about the tiny parts inside your car’s engine that keep everything running smoothly? One such part is the piston pin. You might not think about it much, but without it, your engine would have a lot of trouble. Whether you’re a car enthusiast or just curious, understanding the role of piston pins and how to replace them can be super helpful.
So, if you’ve been hearing weird noises from your engine or if you’re just looking to learn more about car maintenance, stick around! We’ll cover everything you need to know, in the easiest way possible.
Understanding the Role of Piston Pins in Engine Performance
If you’re not an expert in car engines, you might not have ever thought about something called the piston pin. But trust me, it’s a small part with a huge job. Let’s take a closer look at what piston pins are, why they matter, and how they impact the way your car engine works. Spoiler alert: they’re very important!
What Are Piston Pins?
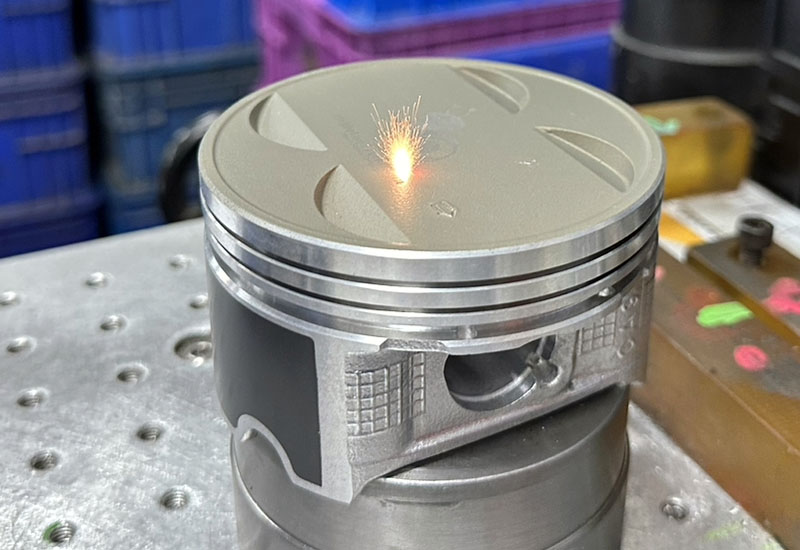
Piston pins, sometimes called “wrist pins,” are parts in your car engine that connect the piston to the connecting rod. The piston moves up and down in the engine cylinder, creating the power that drives your car. But here’s the thing: it can’t do this alone. The piston pin helps the piston move in the right direction without getting stuck or misaligned. Think of it like a hinge that holds two important parts together.
It’s pretty cool how something so small has such a big job, right? These little pins allow the piston to move without getting damaged by the constant heat and pressure inside the engine. They also help reduce friction between the piston and the connecting rod, which is super important for engine efficiency.
Why Piston Pins Matter to Engine Performance
Now that you know what piston pins are, let’s talk about why they’re so important. Imagine trying to run a race with one of your shoes falling off. It would be hard to move smoothly, right? That’s what happens to your engine if the piston pin isn’t working right. Without the piston pin, the piston can’t move properly, and this can cause all kinds of problems for your engine.
Piston pins help control the movement of the piston, which means they are directly connected to how much power your engine can produce. If the pin fails, you’ll notice poor engine performance. Your car might start shaking, making strange noises, or it could even stop working completely. Keeping your piston pins in top shape ensures that your engine stays efficient and powerful.
How Piston Pins Affect the Overall Engine
Every part in an engine is connected, and the piston pins play a key role in that. They take the pressure from the piston and transfer it to the connecting rod, which then sends it to the crankshaft to create motion. If your piston pins start to wear out, the whole engine could suffer. In fact, if the piston pin fails, it can cause damage to other engine parts, leading to bigger (and more expensive) repairs down the road.
In short, piston pins are a small but mighty part of your car engine. They help ensure smooth operation, prevent friction, and allow the engine to generate power effectively. So, when your piston pins are in good shape, your engine runs like a dream. When they aren’t, you could have some serious problems on your hands.
Signs That Your Piston Pins Need Replacement
So, now you know how important piston pins are. But how do you know when they need to be replaced? You don’t want to wait until your car is making weird noises or starts acting up. Let’s look at some warning signs that could mean your piston pins are on their way out and need a replacement.
1. Unusual Engine Noises
Have you ever heard strange knocking or tapping sounds coming from your car engine? If your piston pins are worn out, they might not be able to hold the piston and connecting rod together properly, which can cause these sounds. When the piston moves out of alignment or rubs against other parts, you’ll hear an unmistakable knocking noise. If you hear anything like this, it’s a sign that something isn’t right and the piston pins might be the issue.
These noises are often the first indicator that there’s trouble brewing inside your engine. While they could be caused by other issues, if they’re happening often, you should definitely check the piston pins as part of your troubleshooting.
2. Decreased Engine Performance
One of the most obvious signs that something’s wrong with your engine is a drop in performance. If your piston pins are worn or damaged, the engine may struggle to produce the same amount of power it used to. You might notice that your car accelerates more slowly, has trouble going uphill, or feels like it’s dragging. A worn-out piston pin can prevent the piston from moving smoothly, reducing engine efficiency and overall performance.
When piston pins are bad, they can also cause your car to use more fuel because the engine isn’t working at its best. So, if you’re noticing a drop in power or your fuel efficiency is suffering, it’s worth considering whether the piston pins need to be replaced.
3. Engine Overheating
If your engine is constantly running hotter than usual, it could be another sign that your piston pins are wearing out. When the piston pins don’t allow the piston to move properly, it increases friction. This friction causes extra heat, which can lead to the engine overheating. An overheated engine can cause even more damage to your car, so don’t ignore this symptom.
If you’ve been checking the usual suspects like your radiator and coolant levels but still experiencing overheating, it might be time to look at the piston pins. They could be a hidden cause of the problem.
4. Increased Oil Consumption
Piston pins help the piston move smoothly, but when they wear out, they can cause extra friction. This friction can lead to increased oil consumption because the parts aren’t working as efficiently. If you’ve noticed that you’re having to top off your oil more often than usual, this could be a sign that the piston pins are damaged.
High oil consumption can also lead to further engine issues if not addressed, so keep an eye on your oil levels and consider checking the piston pins if it’s becoming a recurring problem.
5. Poor Compression
A failing piston pin can lead to poor compression, which means that the air and fuel mixture in the cylinder isn’t being sealed properly. Poor compression can cause all sorts of issues, from rough idling to engine misfires. If your car is misfiring or running roughly, it’s definitely worth checking the piston pins. Poor compression due to a bad pin can seriously affect engine performance, so replacing the piston pin is often necessary to fix the issue.
6. Vibrations or Shaking
Another symptom of failing piston pins is excessive vibrations or shaking while driving. When the piston doesn’t move smoothly, it can cause the engine to vibrate. These vibrations could be noticeable at high RPMs or when you’re driving at certain speeds. If your car feels shaky or unstable, especially when you’re accelerating, it could be time to inspect the piston pins.
Vibrations are a sign that something isn’t working properly inside your engine, and it’s important to get to the bottom of it before the problem gets worse.
Step-by-Step Guide on How to Replace Piston Pins
If you’ve identified one or more of the signs mentioned above and have confirmed that the piston pins are the issue, you’ll need to replace them. Replacing piston pins might seem like a big task, but don’t worry. We’ve broken it down into simple steps so you can get your engine back in shape in no time.
Step 1: Gather the Necessary Tools
Before you dive into replacing the piston pins, it’s important to have all the right tools. Here’s a list of what you’ll need:
- Socket wrench set
- Piston pin puller (special tool for removing the piston pin)
- Torque wrench
- Gasket scraper
- New piston pins (be sure to match the size with your engine’s specifications)
- Engine oil and lubricants
- Owner’s manual for torque specs
Having everything ready will save you time and effort. Plus, it’ll help make sure the job goes smoothly.
Step 2: Disconnect the Battery and Drain the Oil
Before you start working on the engine, safety comes first. The first thing you need to do is disconnect the car’s battery. This will prevent any electrical accidents while you’re working on the engine. Simply use a wrench to remove the negative terminal of the battery, ensuring that no power is running through the car’s electrical system.
Next, you need to drain the engine oil. This is important because oil can spill out when you remove certain engine parts, and you don’t want to make a mess or waste the oil. To drain the oil, place a container under the oil pan and unscrew the drain plug. Let the oil drain completely before moving on. If you plan to reuse the oil later, make sure it’s clean and free from any dirt or debris.
It’s also a good idea to let the engine cool down if it’s been running recently. Working with hot parts can be dangerous, so give the engine some time to cool before you start.
Step 3: Remove the Cylinder Head and Pistons
Now comes the part where you’ll start disassembling the engine. The goal here is to get access to the pistons, which are where the piston pins are located. First, you need to remove the cylinder head. The cylinder head is the large part of the engine that covers the cylinders where the pistons move up and down. You’ll need to remove any bolts or fasteners holding it in place. Keep track of these bolts, as you’ll need them when you reassemble the engine.
Once the cylinder head is removed, you should have a clear view of the pistons and connecting rods. The pistons are typically inside the engine block, and they’re connected to the connecting rods. To access the piston pins, you’ll need to remove the pistons from the cylinders. This is usually done by removing additional bolts that secure the pistons in place. Be gentle when removing the pistons to avoid causing any damage.
At this point, you might also need to remove the intake manifold and exhaust manifold, depending on your car’s design. These components block your access to the engine, so removing them will give you better space to work.
Step 4: Remove the Old Piston Pins
Now that the pistons are out of the engine block, it’s time to remove the old piston pins. This is where the piston pin puller tool comes in handy. A piston pin puller is designed to safely remove the pins without causing damage to the surrounding parts. Place the puller around the piston pin and carefully remove it. Depending on the type of engine you have, you may need to tap the tool lightly to free the pin.
Once the pin is loose, gently pull it out. Take care not to scratch or damage the piston or connecting rod during this process. You don’t want to cause any additional problems while replacing the piston pins. If the pin is stuck and doesn’t come out easily, be patient. Forcing it could cause permanent damage.
As you remove the piston pins, keep them in a safe place so you can compare their size with the new pins you’re going to install. This ensures that you’re using the correct replacement parts.
Step 5: Install the New Piston Pins
With the old piston pins removed, it’s time to install the new ones. Before inserting the new pins, apply a small amount of engine oil or lubricant to the pin. This helps it slide in smoothly and reduces friction when the engine starts up. Lubricating the pin also prevents damage to the piston and connecting rod during the installation.
Carefully insert the new piston pin into the piston and connecting rod. Ensure that the pin is positioned properly and that it fits securely. It should move freely without too much resistance, but it shouldn’t be loose either. Be sure to align the pin with the correct holes in the piston and rod.
Once the new pin is in place, you can repeat this process for all the pistons that need new pins. It’s important to make sure that everything is aligned correctly and that the pin is fully seated in place before moving on to the next step.
Step 6: Reassemble the Engine
Once the new piston pins are installed, it’s time to start putting everything back together. Begin by carefully placing the pistons back into their cylinders. This might take a little time, as you’ll want to make sure each piston is seated properly. You may need to gently tap the pistons into place, but be careful not to damage any of the surrounding parts.
Once the pistons are back in their cylinders, it’s time to reattach the cylinder head. Position the head over the engine block and secure it with the bolts you removed earlier. Tighten each bolt gradually in a criss-cross pattern to ensure an even seal. It’s important to follow the torque specifications from your car’s manual to make sure the cylinder head is tightened to the correct pressure.
Next, reattach the intake and exhaust manifolds, if you removed them earlier. These parts should be reconnected in the reverse order that you removed them. Again, tighten everything according to the torque specifications.
Step 7: Refill the Oil and Test the Engine
The final step is to make sure everything is properly lubricated and to test your work. Start by refilling the engine with fresh oil. Since you drained the oil earlier, you need to make sure the engine is properly lubricated before starting it again. Pour the recommended amount of oil into the engine and check for any leaks.
Once the oil is filled, reconnect the car’s battery. You’re ready to start the engine! Turn on the engine and listen carefully. You want to make sure everything is running smoothly without any strange sounds. Let the engine run for a few minutes and keep an eye on the oil pressure and temperature gauges to ensure the engine is operating normally.
If you hear any unusual noises or notice any problems, turn off the engine immediately and recheck your work. It’s better to catch any issues now rather than risk further damage to the engine.
Congratulations! If everything sounds good and your engine is running smoothly, you’ve successfully replaced the piston pins and completed the job!
Frequently Asked Questions
Is it necessary to replace piston pins?
Yes, piston pins wear out over time due to the heat and pressure in the engine. If they become damaged, it’s necessary to replace them to prevent further engine damage.
Can I replace piston pins myself?
Yes, replacing piston pins is a job you can do yourself if you have the right tools and knowledge. However, it can be challenging, so if you’re not comfortable with engine work, it’s a good idea to consult a professional mechanic.
Do I need to replace the connecting rods with the piston pins?
Not necessarily. If the connecting rods are in good condition, you can usually keep them. However, it’s important to inspect both the piston pins and connecting rods to ensure they are both functioning properly.
Is it possible for piston pins to wear out prematurely?
Yes, improper lubrication, overheating, and excessive engine load can cause piston pins to wear out faster than normal.
Can a worn-out piston pin cause engine misfires?
Yes, a worn-out piston pin can affect the piston’s movement, leading to poor compression and misfires.
Is there a way to tell if my piston pins are wearing out without removing the engine?
Yes, you can look for signs like unusual engine noises, reduced performance, overheating, or increased oil consumption.
Do I need to replace the piston rings when replacing the piston pins?
It’s not required, but it’s a good idea to check the piston rings when replacing the piston pins. If the rings show signs of wear, it’s best to replace them too.
Can I drive with bad piston pins?
Driving with bad piston pins is not recommended. It can lead to more serious engine damage and might make your car unsafe to drive.


